


When buying an RV, the first thing you will notice is that they are all pretty much BROWN inside… or beige… or grey… or any other color that I guess does not show dirt easily but is just really DEPRESSING. At least that’s what we thought! During our search for a good used RV, we stumbled upon a lady who buys and resells RVs for a living, while updating and pimping them in between. What she did looked really cool, so we decided to look beyond the nasty colors of the RV and get those out of the way once we bought it.
What did we do?
So our RV was in the basis a very good RV with limited mileage and quite some good appliances that were all in working order. While we are quite handy, some technical things we really did not want to get our hands on, so that was a must from our buying list. Then we set out to make a list of must-do’s and nice-to-haves, which turned out like this:
- Fix the roof – There were some early signs of potential leaks. Now we are not going to lie, our friend Chris actually took care of this job for us, but according to him it is relatively easy to do.
- Replace the awnings – The original awnings were very tattered from being in the Florida sun, so we bought awning fabric at Shadepro to replace them with.
- Paint the interior – Now this is a big job to do (always disappoints), but the rewards are big, so do it ONCE and WELL.
- Replace other miscellaneous but necessary items – Light bulbs to LED, new poophose (duh), and several other things you know you want to replace.
- Decorate! – Now this is of course the fun part, and you can go crazy or keep it simple.
1. Fix the roof
If there is one thing you do NOT want when traveling, it is the risk of having any leakage in your RV. While our RV did not show any signs of leakage as we bought it, the Florida sun did eat away at the roof to a point that leakages could be on the horizon. On top of that, one of the roof vents was completely brittle and had to be replaced. Now our friend Chris who picked up and delivered the RV to us had done roof work before with Eternabond and Dicor, so we were very happy he offered to do this job for us. Check out his website for more tips on RV living and DYI; Calledtowander.com.
2. Replace the awnings
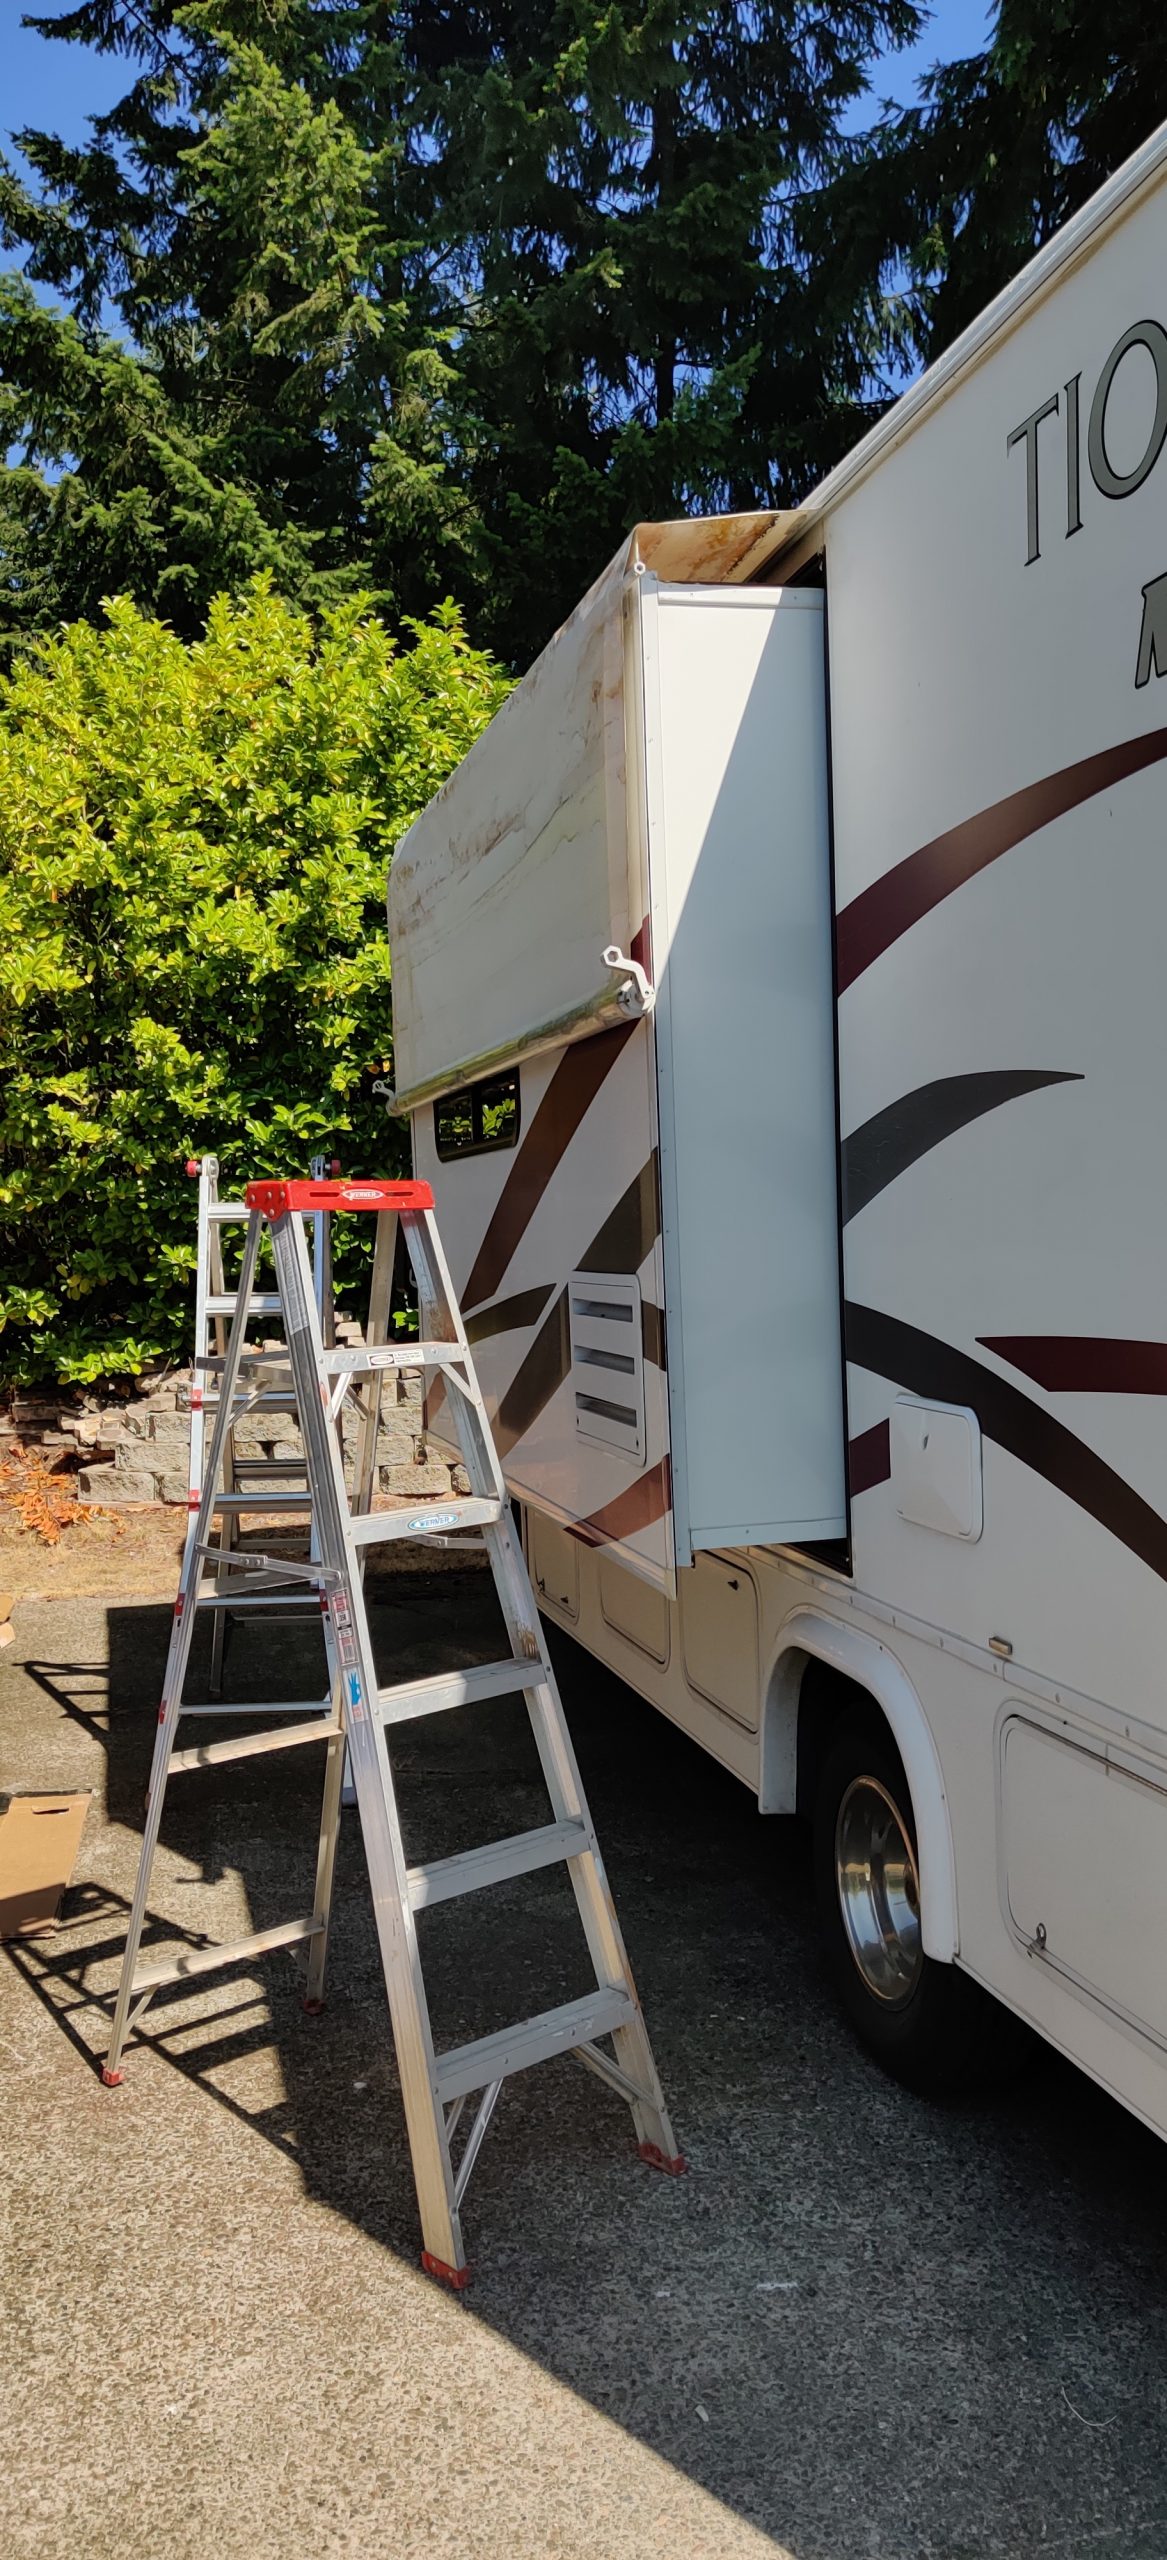
On our RV we had two awnings; One main awning alongside the RV and one on the slide-out. As both were not in good shape, and we really wanted shade on our trip, we decided to find a solution that would not break the bank and make it instantly look good. We found Shadepro, a company that specializes in awnings, and we ordered the right fabric at a fraction of the price it would cost to have it replaced by a professional. For the slide out, they have versions that you can cut to the right size, which is super handy. Now, that sounds great, but you will need to spend some time on it to get it right, and do it somewhere where you have access to tools and two tall ladders.
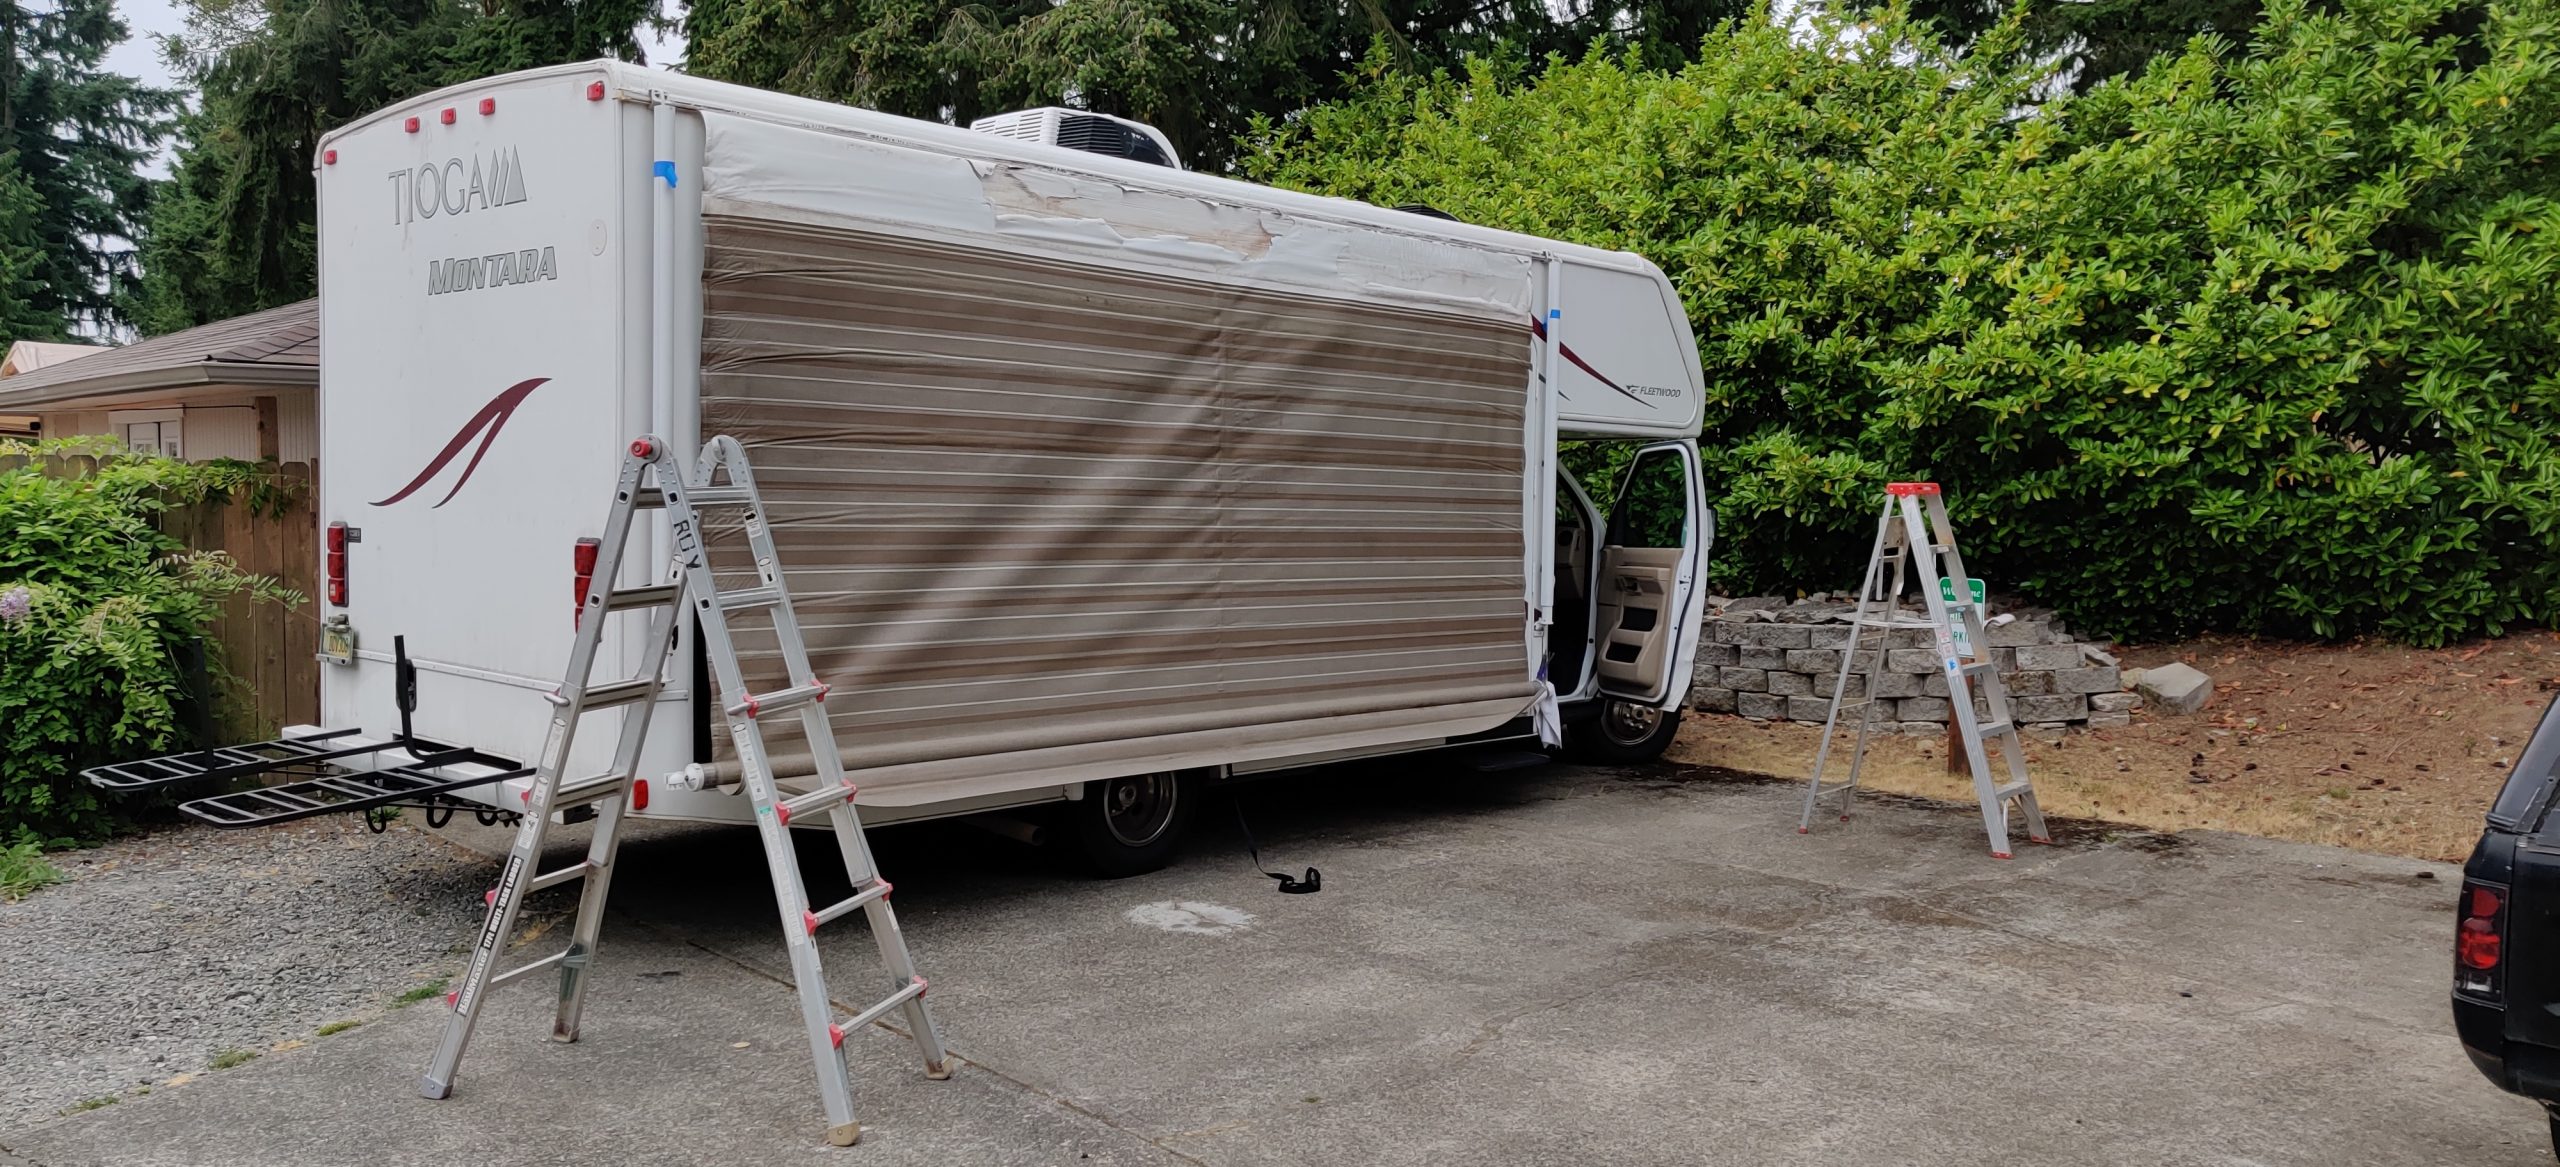
Out with the old… 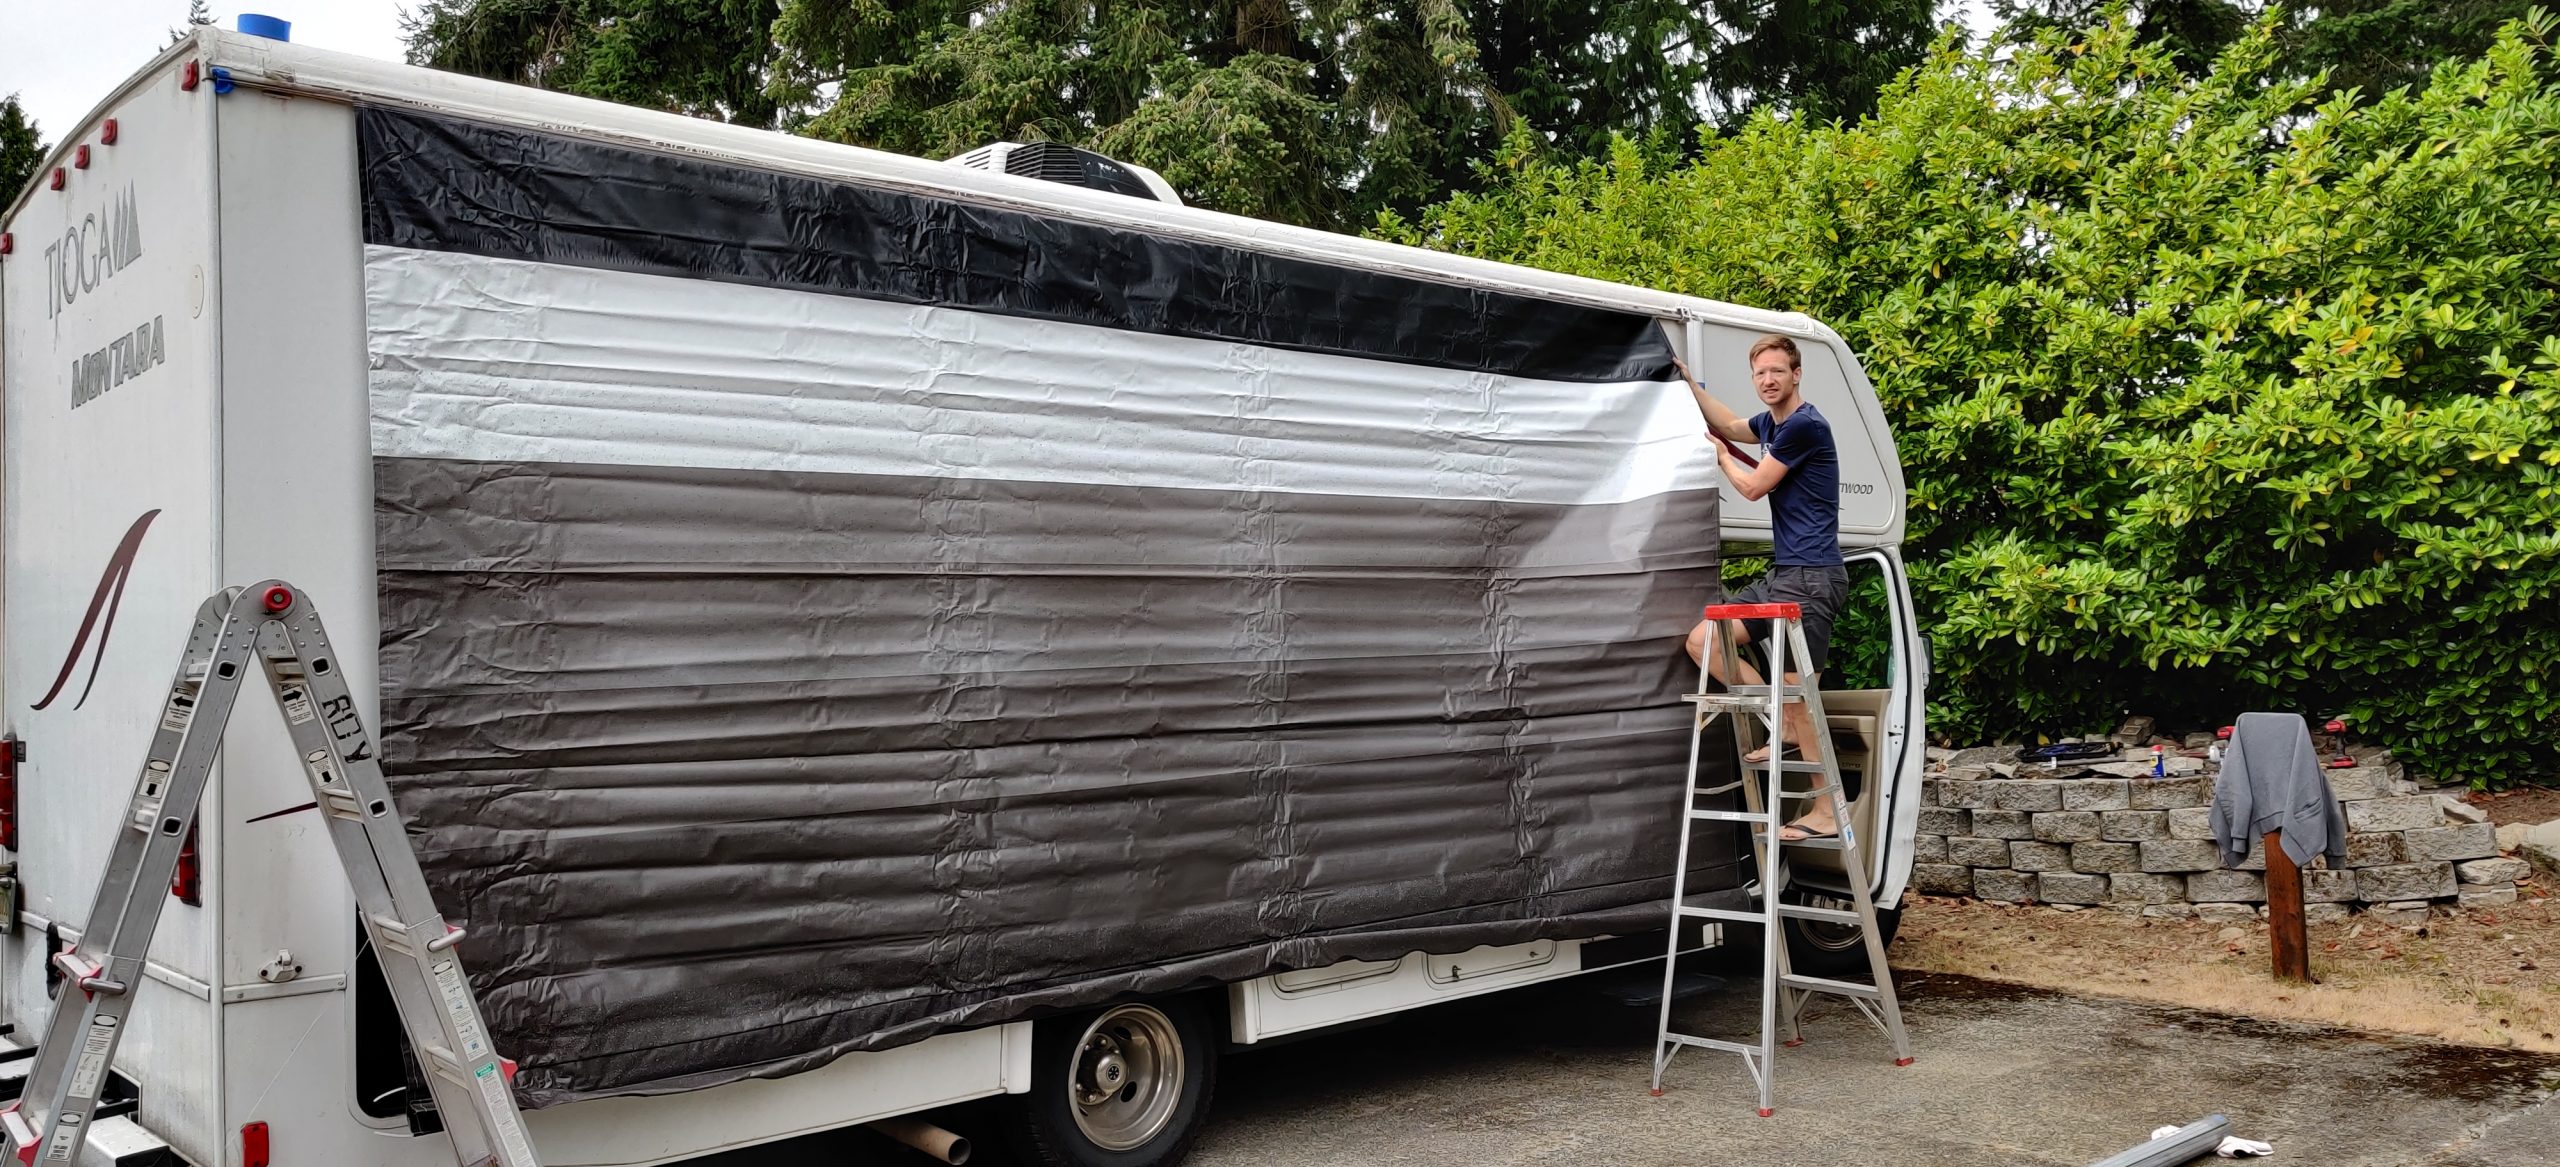
Sven working on our new awning 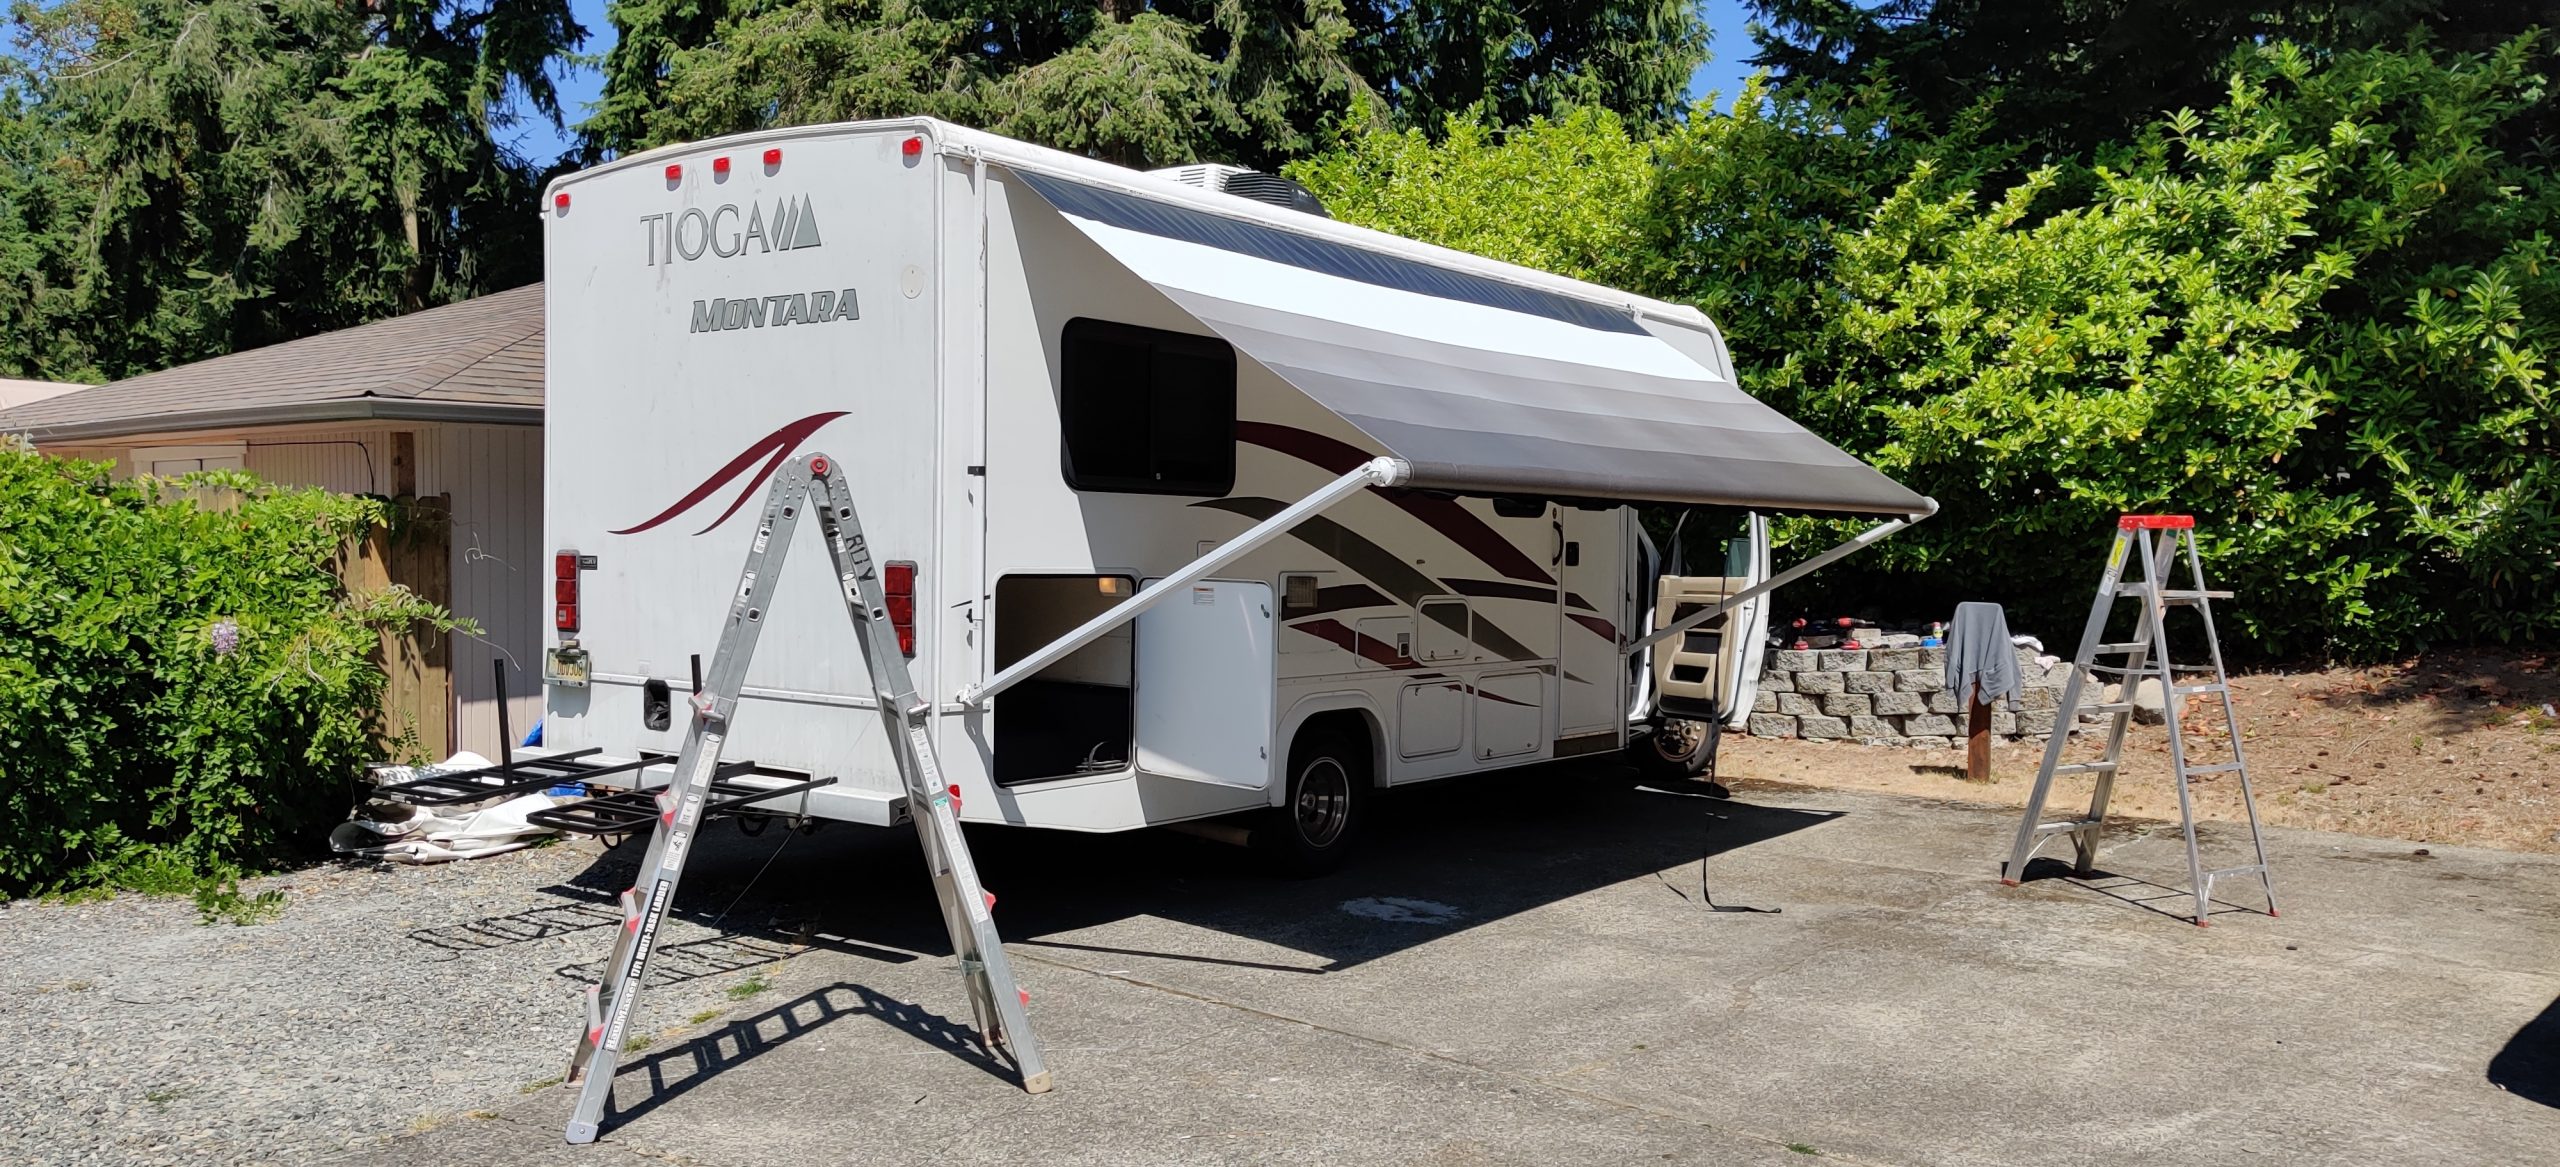
… in with the new!
How to do it? Simple – check YouTube! Make sure you have all the tools you need (we realized just in time that we needed a ‘rivet gun’ which we have never used before) before you start this job, and don’t think you can do it as fast as they say you can, but it was a job done well if you simply follow the steps. As we had two, the second one did come on much faster than the first, so practice does make perfect. It is a one-man job, with some support from time to time to hold things. So make sure you have helpers around when you do it, but the result is absolutely amazing!
The old awning 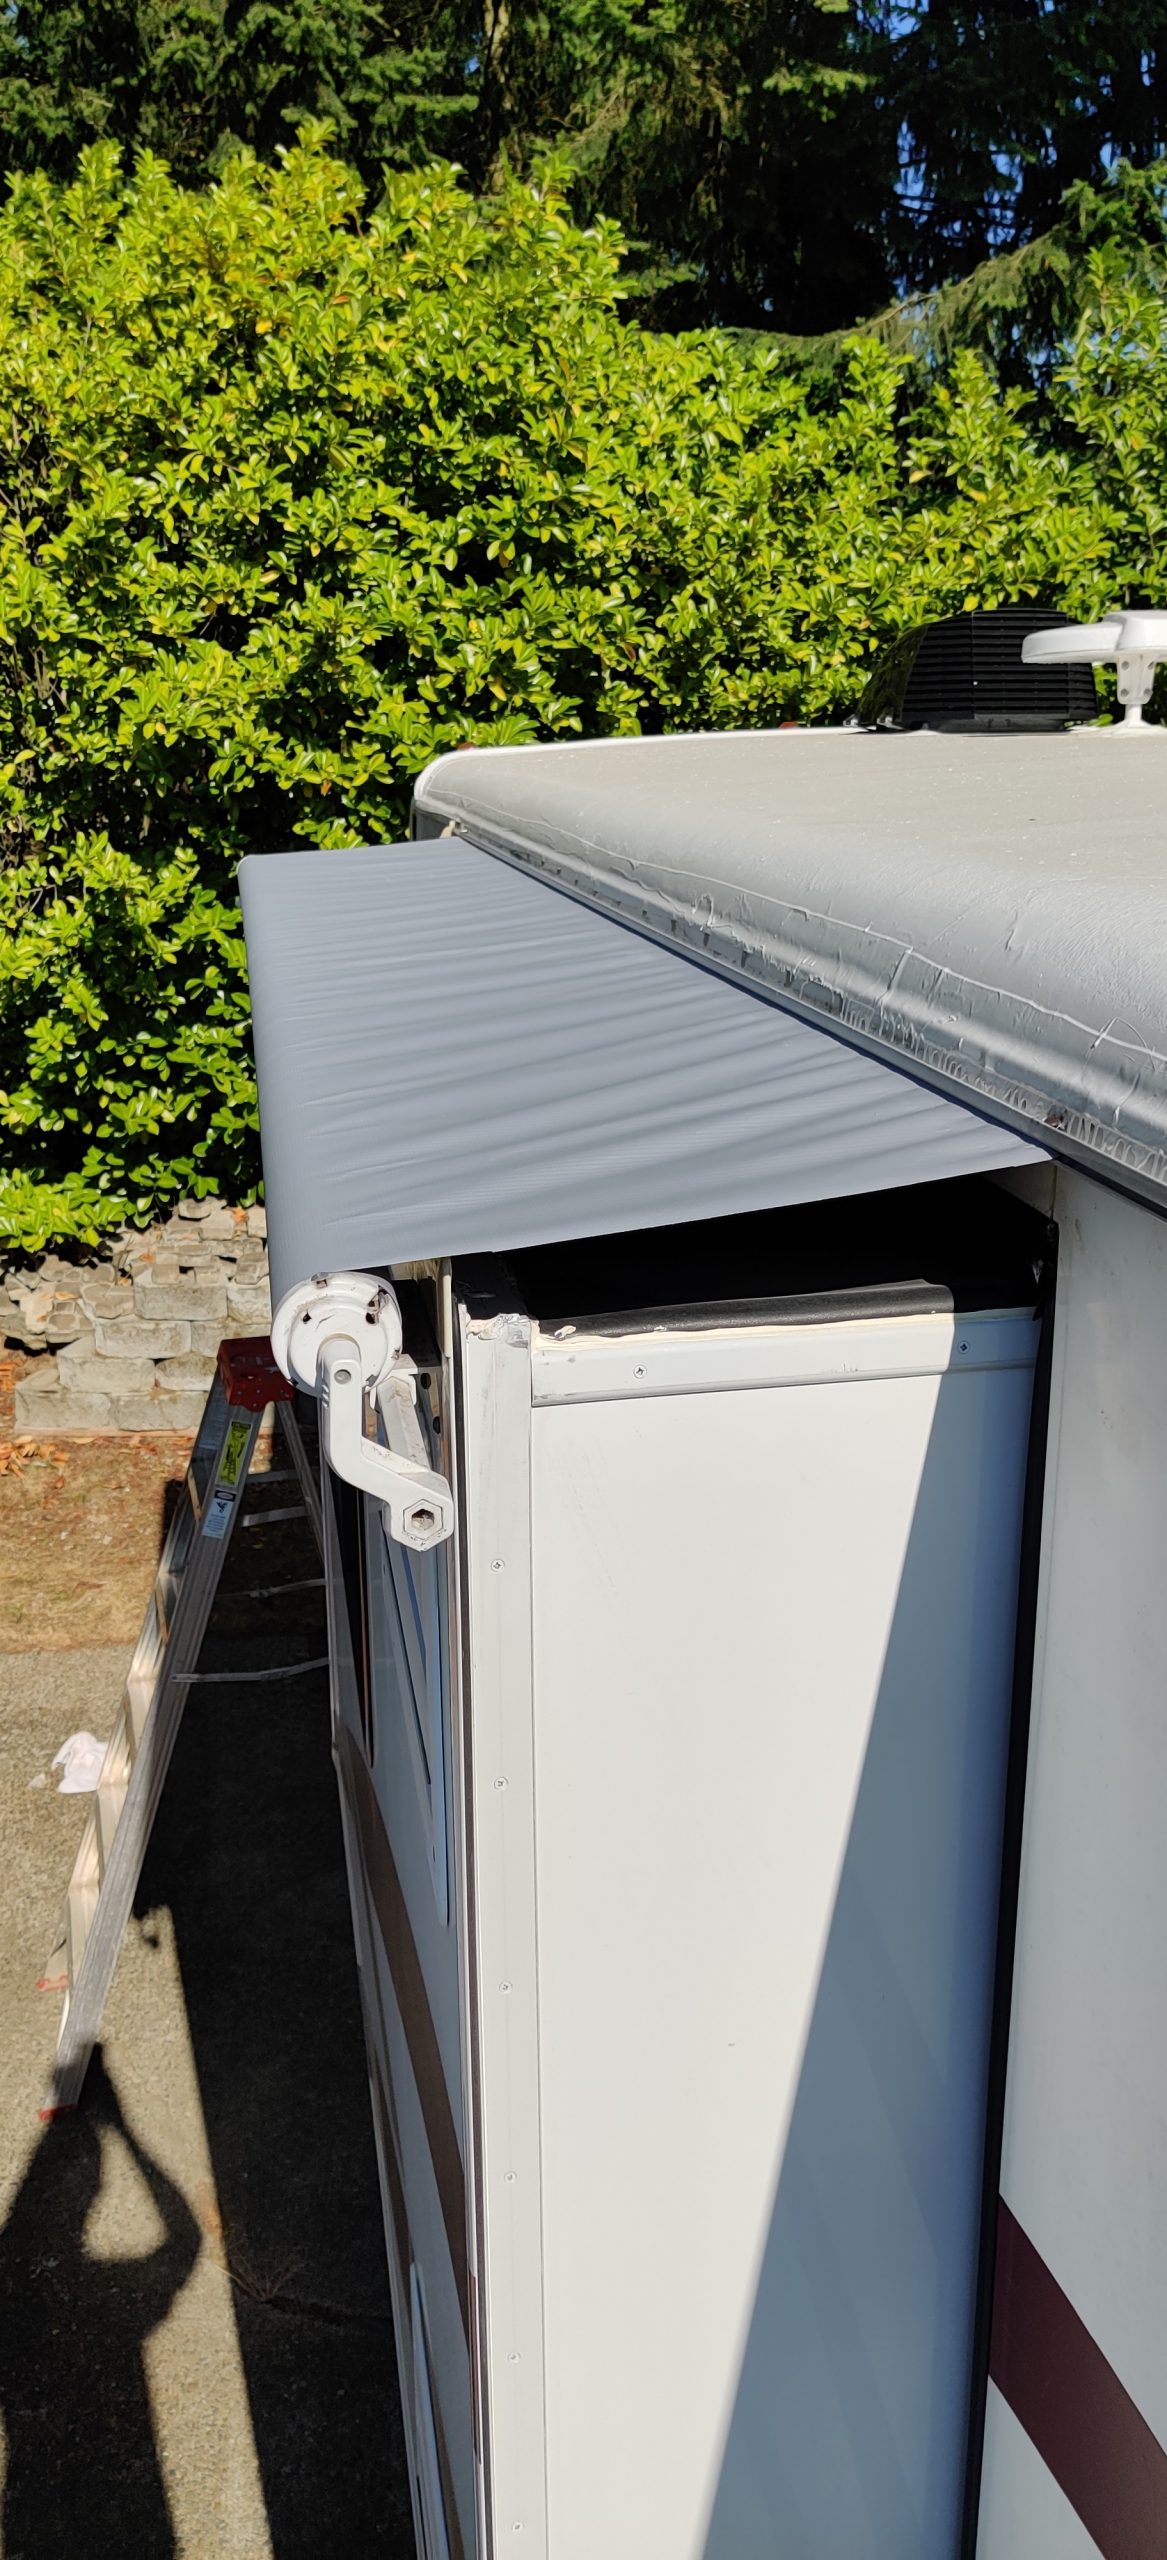
Brand new!
3. Paint the interior
Oh man… painting… now this is a bit of a nightmare, but it is worth it, so you get it done and get it done properly! Of course the most annoying job but also the most rewarding if you do it right is the paint prep. Taping things up, covering parts that should not get paint on them, taking off parts that should be painted outside, unscrew and remove things that are in the way… It was easily half a day to do all that, even on a small 26ft like ours, but it is very necessary if you actually want to live in it right after.
From brown… ish… 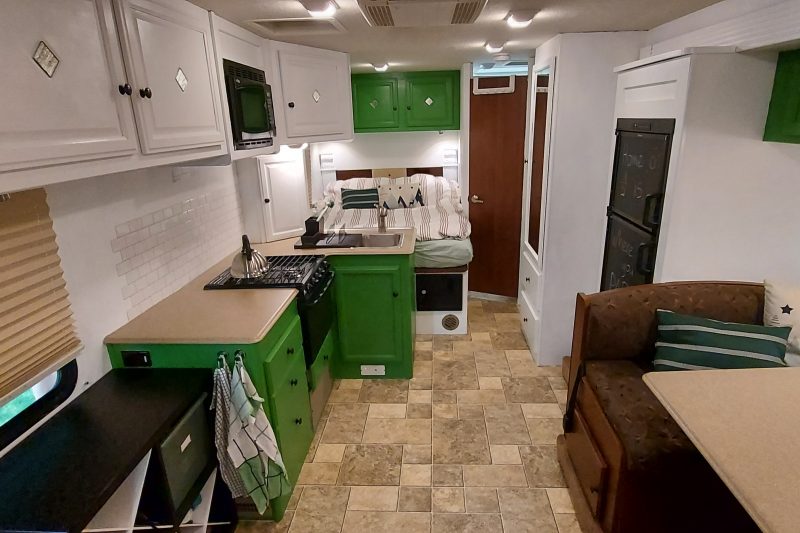
To fresh & vibrant
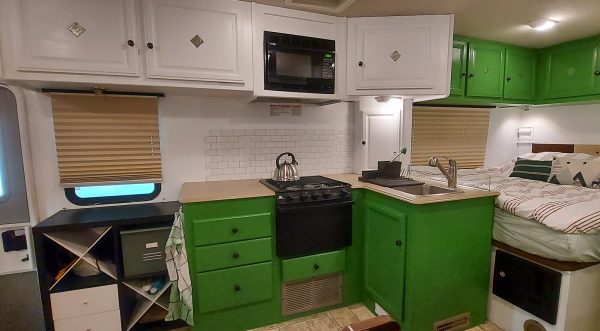
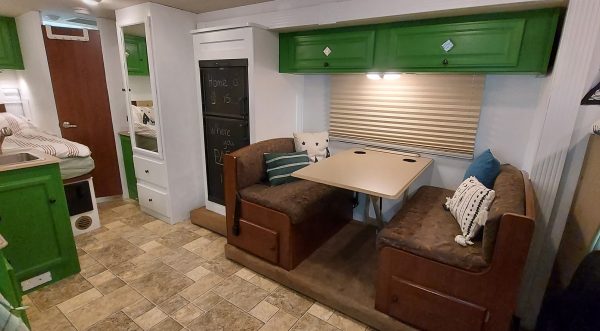
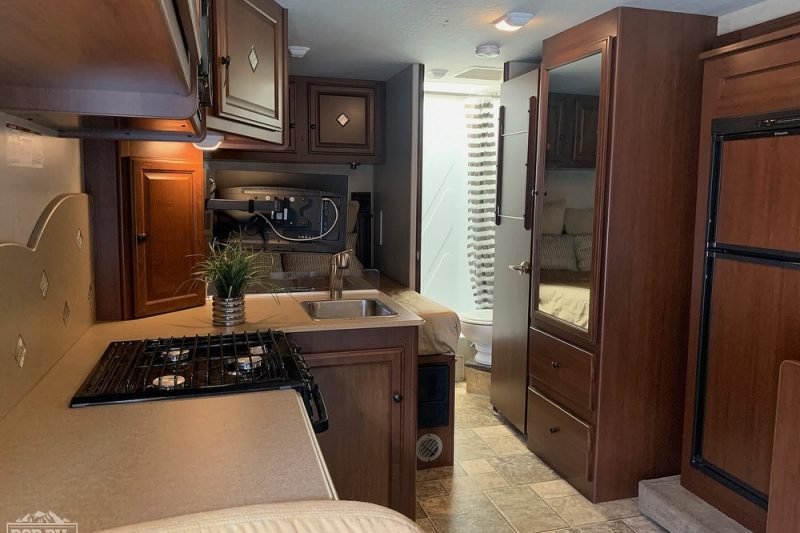
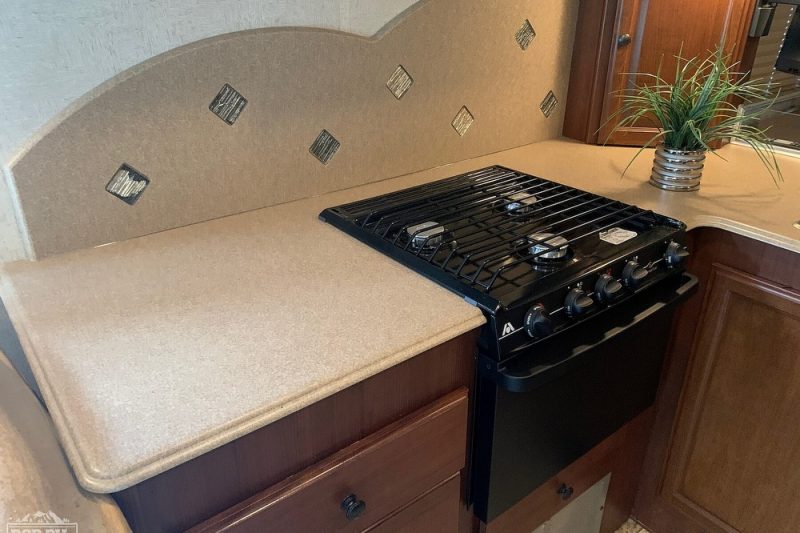
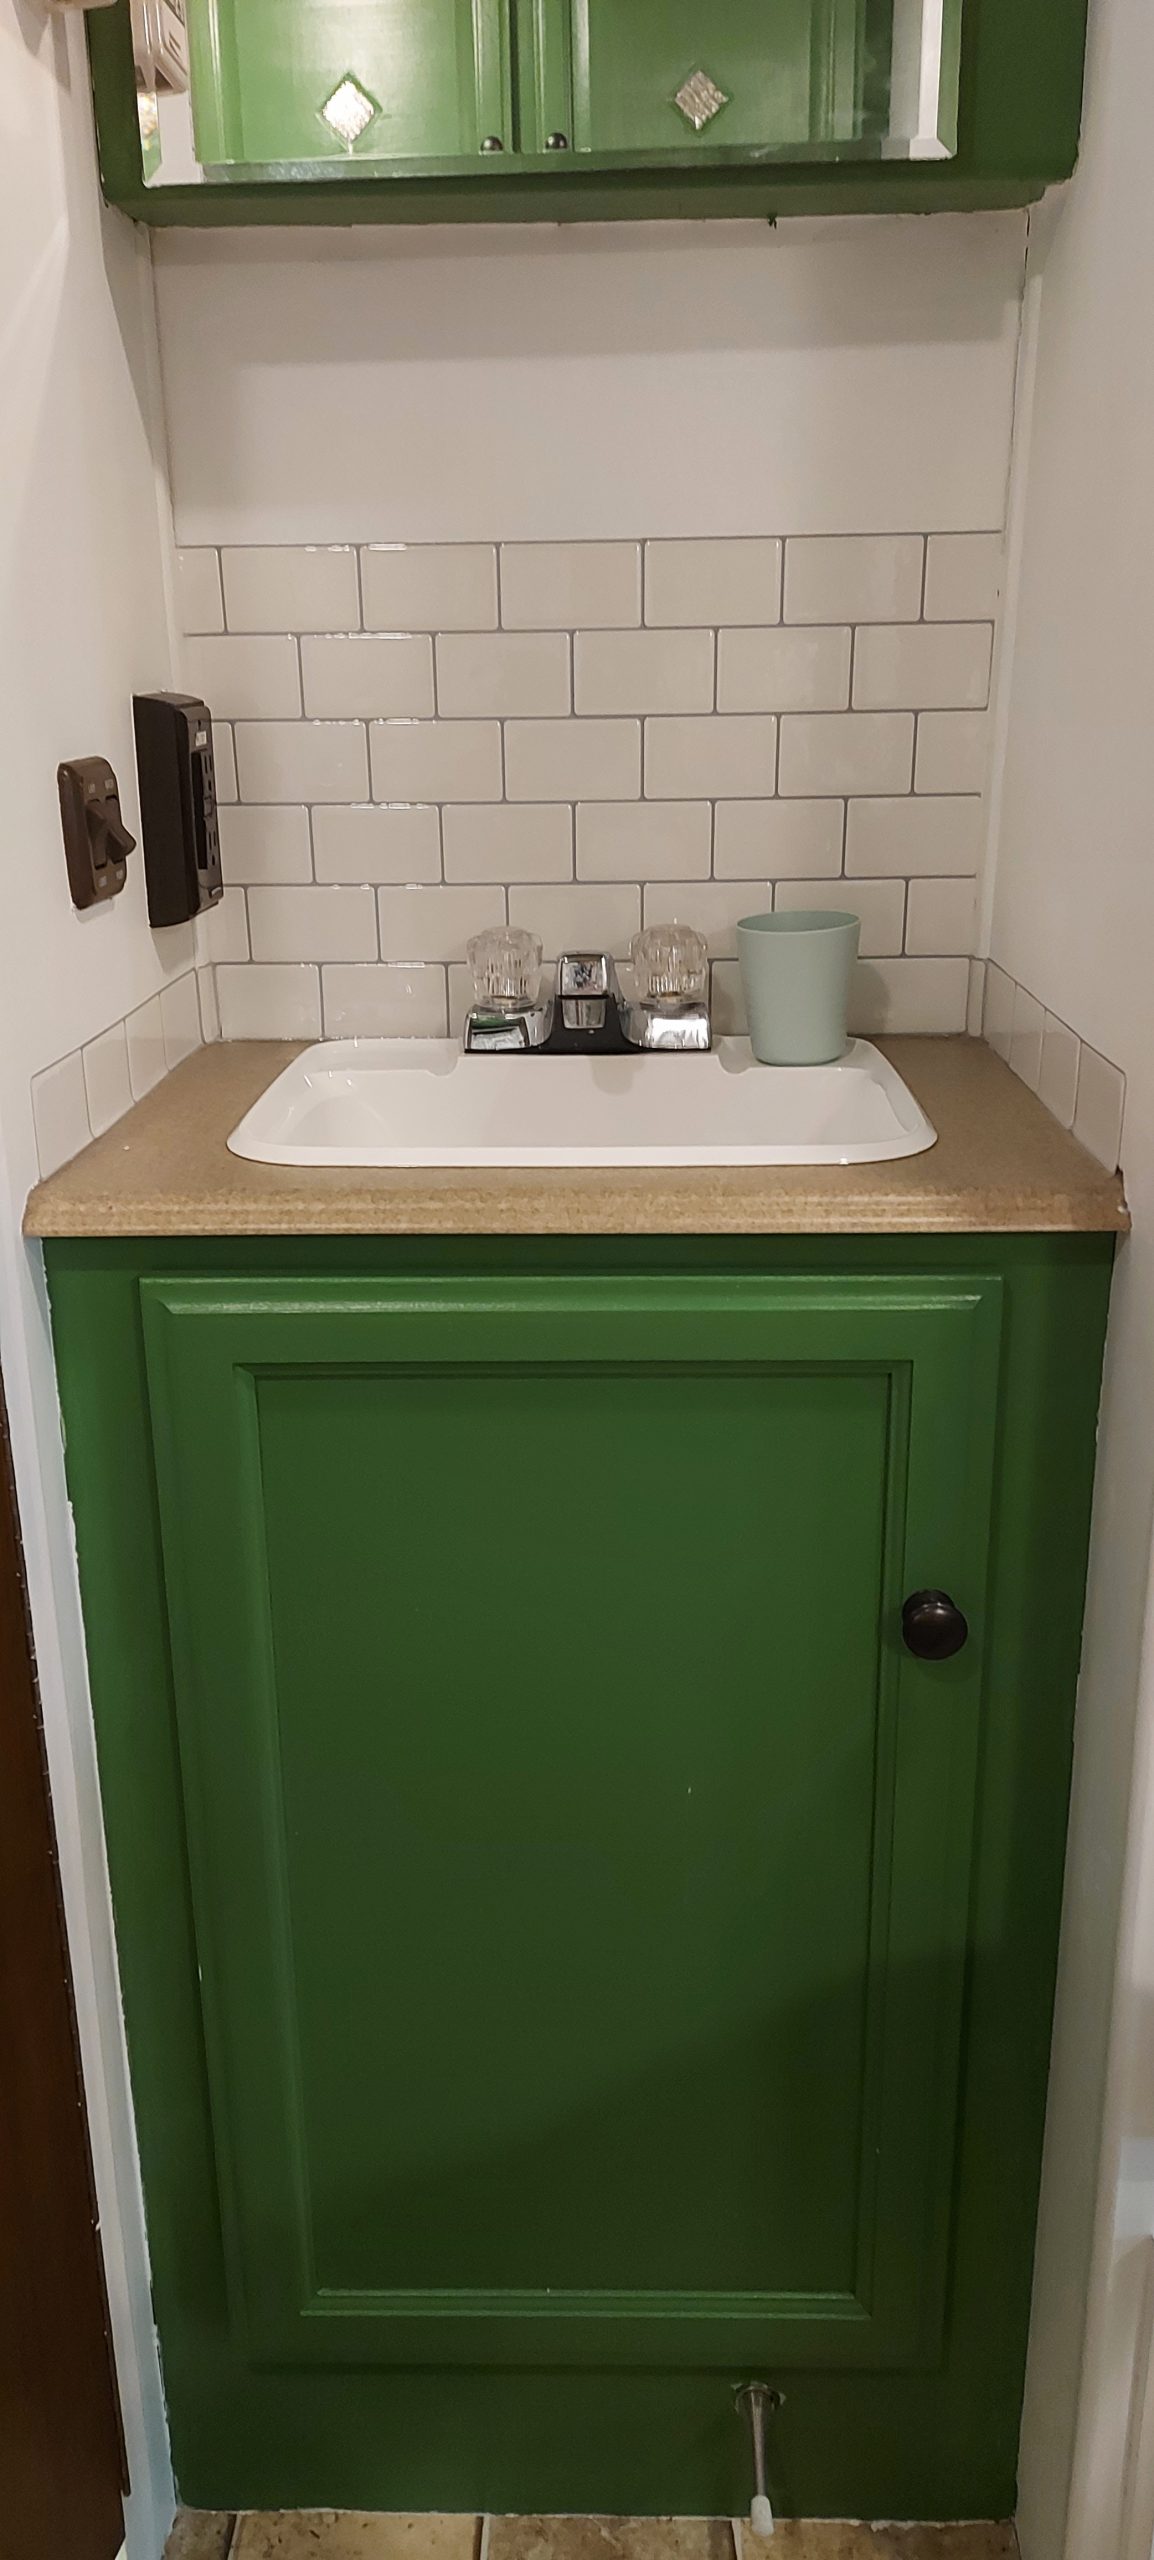
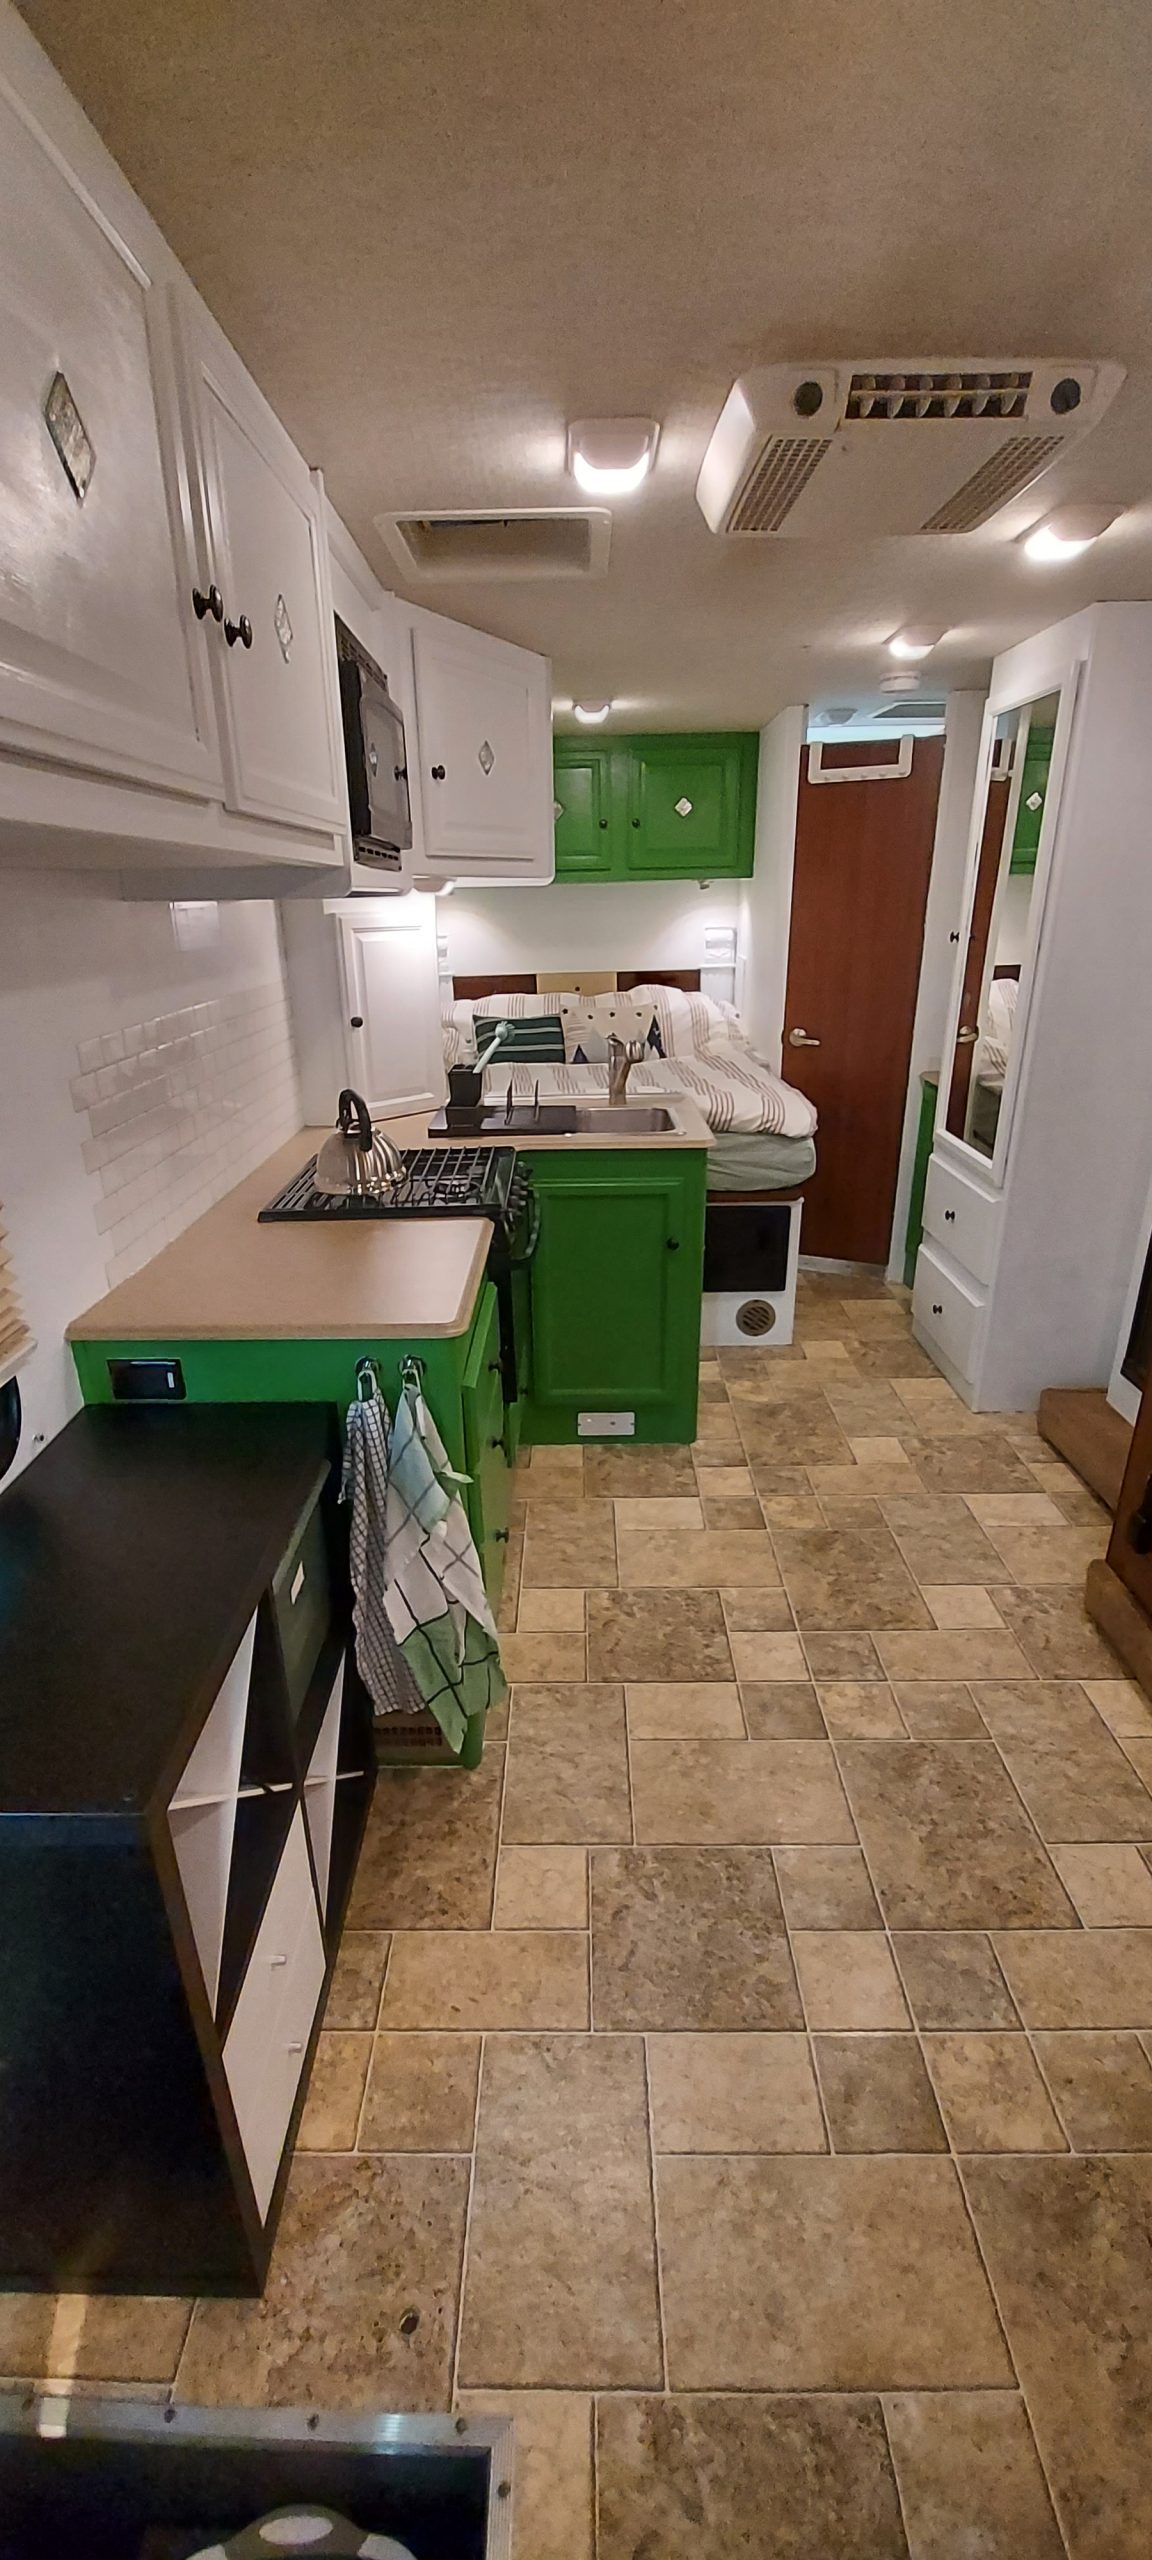
The difficulty with RV’s is that most of the things you will paint are not going to be wood, but plastic. So expect to get most joy out of the painting of the walls, and most frustrations from cabinets as you hit them for the first time and damage your paintwork. Make sure you clean it, prime all, and then do a light sand and clean again. It will never be 1 layer cover (if you find that one type of paint that does, let me know), so if you want to do this in a day, invest in primer/paint that dries fast enough for you to do another cover after it. After the painting, hang on to your leftover paint so you can patch things up when (not IF) accidents happen. Light colors (whites) will really open up your space, so make sure top cabinets are predominantly white, but don’t be skimpy on some fun color to match! Consider that some parts will not be painted so make sure your colors match with those. We went with white and green, as they match well with some of the brownish elements we would have to live with like the kitchen countertop.
4. Replace other miscellaneous but necessary items
As you go through a 9 year old RV, you will notice some things are out of date… or just not your thing… or you want your own just because :-). Here is a list of things we did, to give you a feel.
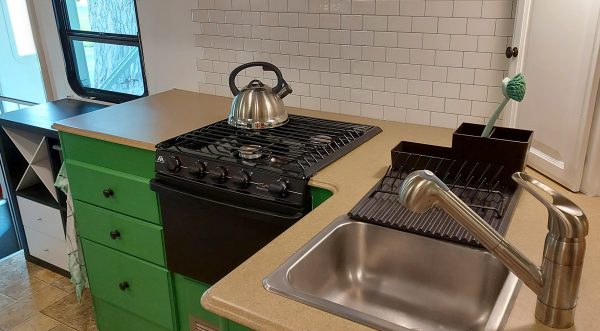
- Replace the backsplash of the kitchen and sink – They came off quite easily to our surprise, and we replaced them with a simple stick&peel tile which had a very cool effect. Doing it right is tricky (no RV is straight, and once stuck you can not unstick easily!), but once it is there it is instant gratification.
- Replace lights with LED – A no-brainer if you want to save energy, but many old RVs will still be equipped with old light bulbs that will be a waste.
- Replace the poophose – Maybe it is us, but using the poophose of somebody you do not know just does not feel right. To replace it is not that big of an investment, and it simply feels better to know the hose has only carried your (parties) number 2s…
Ugly backsplash out… 
Stick & peel tiles in!
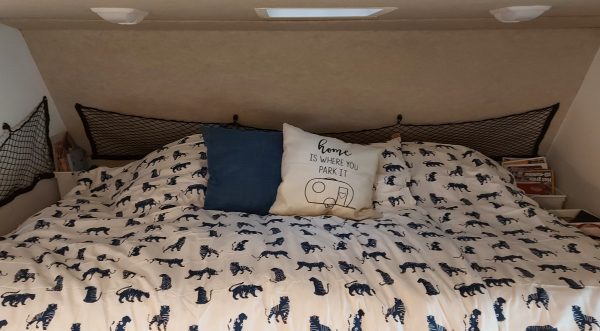
- Replace the mattresses (and bedding) – Same as the above, although this is a bigger investment to make so you can hold off on it. We decided to go for it as we would permanently stay in it. For ease, we simply bought a thin topper at IKEA for the upper bunk bed, but for the rear bed the size is a ‘short queen’ which is so specific it will set you back a few hundred…
- Replace kitchen / cookingware – Honestly, you can go all out here… Starting from just replacing the cookware (cutlery, cups, plates, pans) to going all out and creating a proper kitchen on wheels (outdoor grill, Aeropress coffee maker, blender, etc) which will set you back a lot more. Again, we went all out as we love to cook, but just replacing the basics will give you a cleaner feel when in the kitchen.
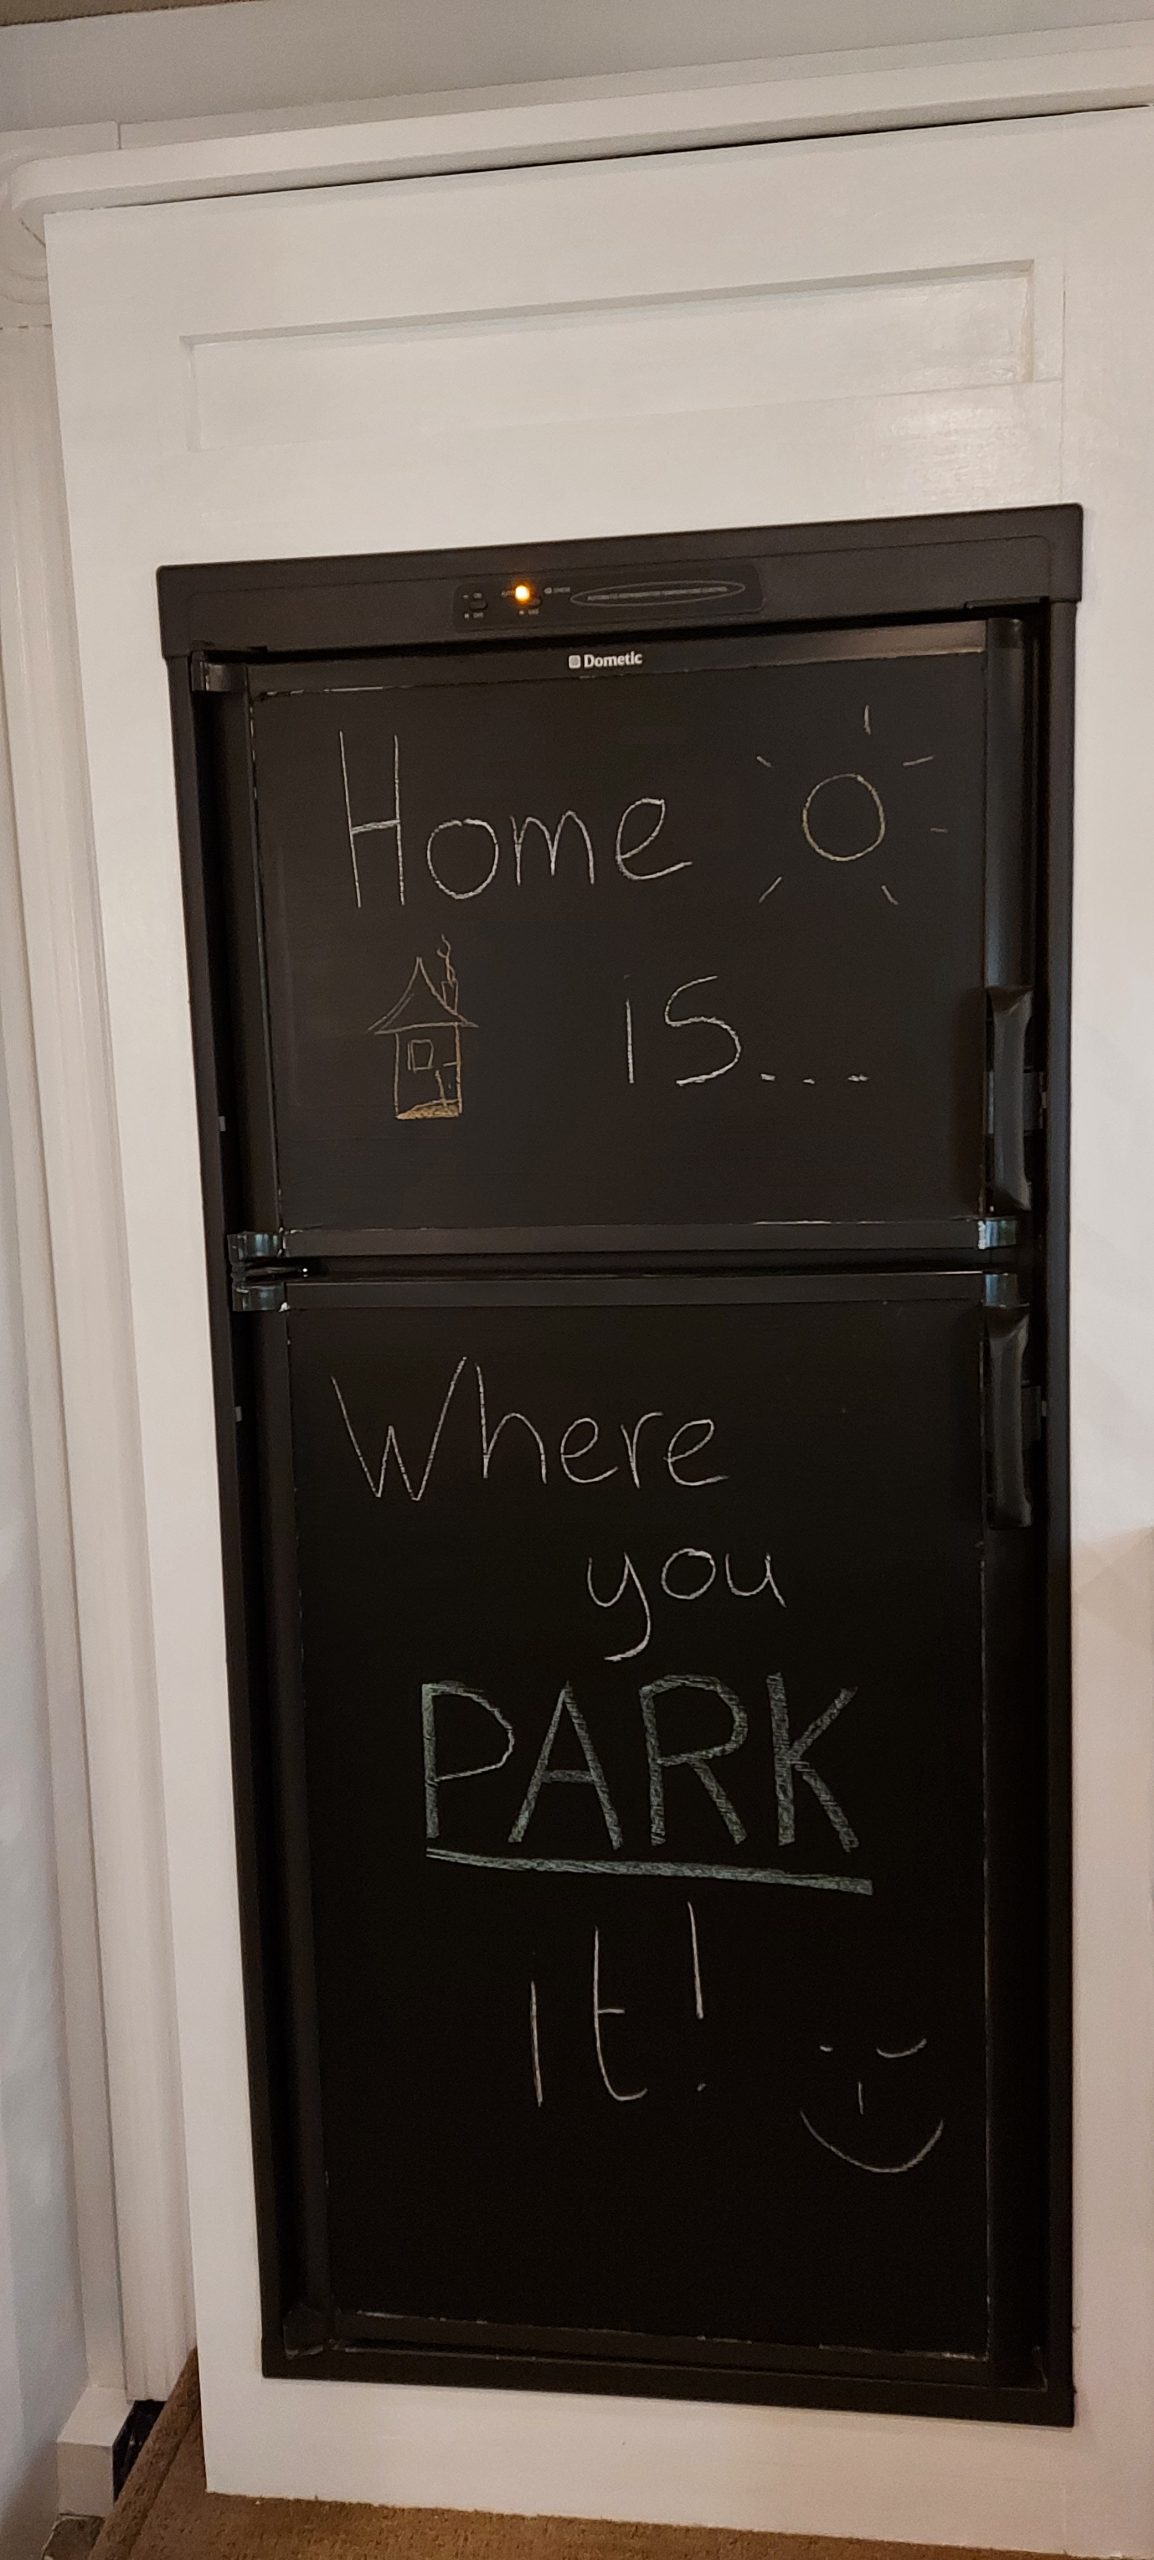
5. Decorate!
This is of course the fun part!! And you can go as crazy as you would like. We invested in new sheets and decorative pillows to give the place some more laid back look. We also bought an extra cabinet in the corner where there was an old, tattered rocking chair to create some more storage and a nice look. Then we bought black driver seat covers to keep the front seats clean and give them a cleaner look – but you could of course go with colors or print here too. We still have some things on the wish list though: One is replacing or covering the fabric on our dinette, and the other is replacing the curtains… but that is a longer term plan :-).
So there you have it, 5 steps to pimp your RV to your dream house on wheels! If you are good at DYI’ing, you can do the bare necessities for around 1,000 dollars. If you want to go all out or need a professional to take care of some of these steps, you can easily spend 5x as much. We ended up somewhere in the middle, doing a lot ourselves, but really making the RV ‘ours’. The choice is yours!
Check our other blogs on RV life and travel through different destinations!
2thumbs up for your splendid redecorating of the RV. It Loks stunning like brand new, I love the colors. It’s really worth the effort in order to make it your home for the next? Months. Looking forward to your next blog. Marie José
Thanks! Quite some blood, sweat and tears have gone into it, but it is certainly worth it!
Good job!!